

A key function of any eDiscovery platform is to let you quickly and easily get to documents you care about. Reveal offers many ways for you to do that. I previously discussed using Work Folders to find documents that you and others have organized as you work on your matter, and using Document Folders to find documents as they were organized when you received them.
Today’s focus is on using Assignments to get to the documents you care about.
Assignments
In Reveal 11, you can create batches of documents, called Assignments. Once created, Assignments can be used to dole out documents for review, analysis, or any other purpose when you want people to be able to go through documents in a controlled manner.
The Assignment feature is available to those with administrative permissions.
Using this feature, you can establish a smoother flow of documents to the people who need to see them most. You can use this approach to improve the speed and quality of document reviews – no doubt the most common deployment of this capability. You also can use it to tee up documents more effectively for specialized analysis by subject matter experts, to make content available to consulting or testifying expert witnesses, and to help with witness preparation.
Using Assignments to Assign Documents
The Process
There are five steps in the process of creating Assignments. These steps are shown in the Assign Documents modal you use for this purpose, with a tab for each step:
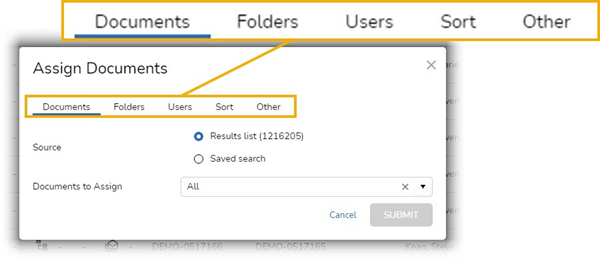
The steps are:
- Documents: Select the documents to assign.
- Folders: Designate the container into which the selected documents will go.
- Users: Assign documents to pools, teams, or individual users.
- Sort: Specify the order in which the documents will be organized.
- Other: Finally, select the Tag Profile to be used with the documents, give the batch a name and/or description (optional), and submit the assignment.
Step 1: Select the Documents to Assign
The first step in assigning documents is to decide what documents you want to assign. You have three basic choices:
- Selected documents: Select specific documents while in the Grid;
- Results list: Assign the results of a search you just ran, or if you have not run a search, assign the entire dataset; and
- Saved search: Use a saved search for the documents to assign.
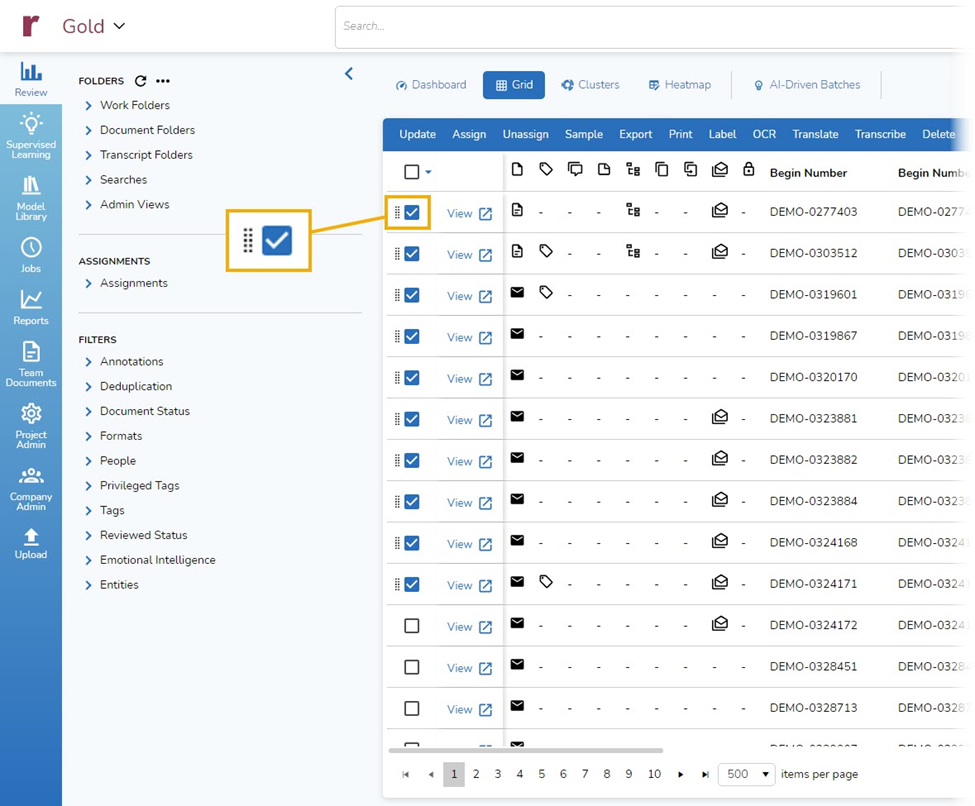
Use Selected Documents
In the Grid view, designate the documents you want to assign. Here, I selected ten documents by clicking in the Update boxes for those documents:
Click on Assign:
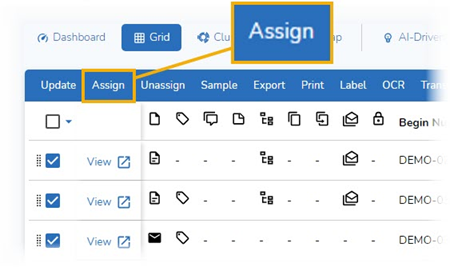
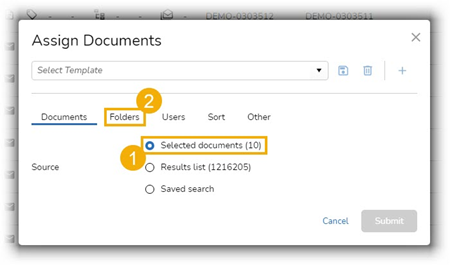
This opens the Assign Documents modal and takes you to the first of five tabs, Documents:

Choose the first Source option, Selected documents, and click on the Folders tab to move to the second step in the process:
Use Results List
If you run a search, you can use the results of that search as the set of documents to be assigned.
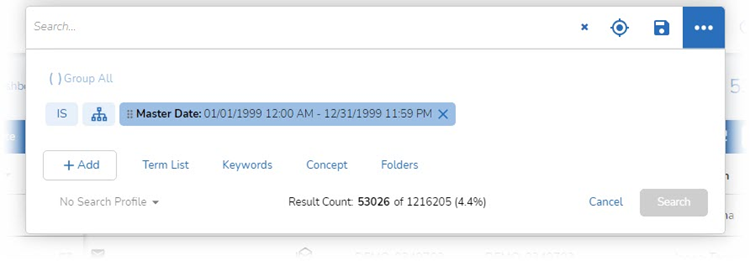
In this example, I ran a search that brought back 53,026 documents:
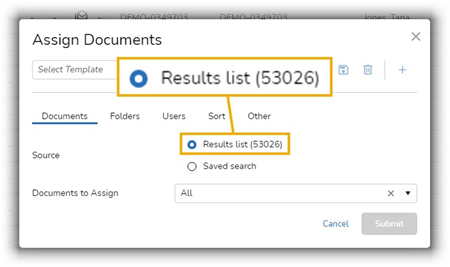
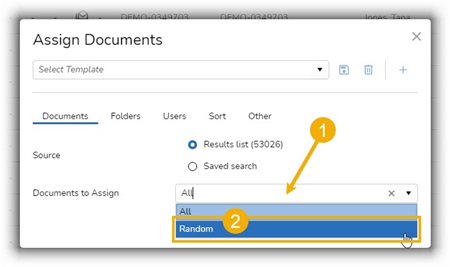
When I select Assign in the Grid view, the Assign Documents modal shows a Results list of 53,026:
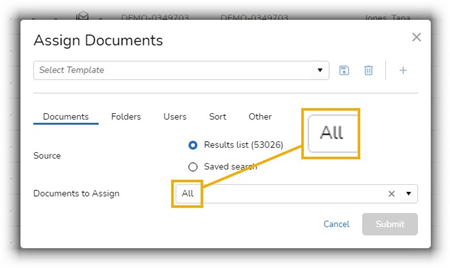
If you want to entire set of search results batched out, you select All under Documents to Assign and then move to the Folders tab:
If you only want to assign a subset of the search results, you click in the Documents to Assign box and select Random:
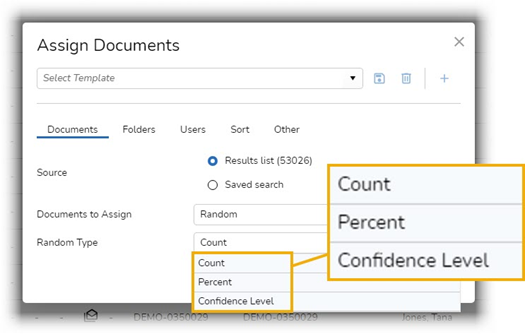
You are offered three types of Random selection: Count, Percent, and Confidence Level:
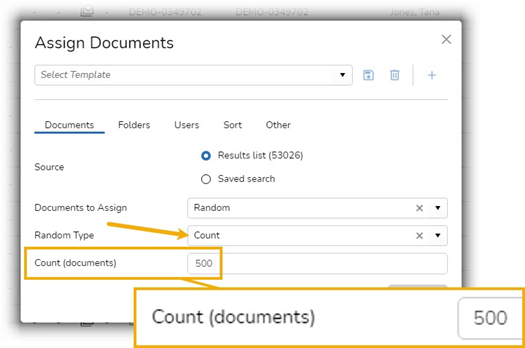
If you select Count, then you enter a number to tell the platform how many documents it should randomly select and assign. After you enter the desired number, go to the Folders tab:
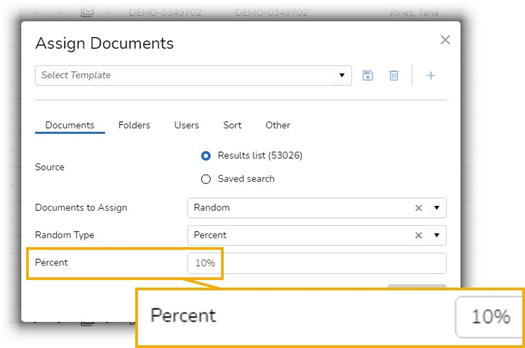
If you select Percent, then you enter a percentage to tell the platform what percentage of documents it should randomly select and assign. After you enter the desired number, go to the Folders tab:
If you select Confidence Level, then you enter the percentage of confidence (Level %) and the margin of error (Margin of Error) that you want the platform to use as it selects random documents. After you enter the desired number, go to the Folders tab:

Use Saved Search
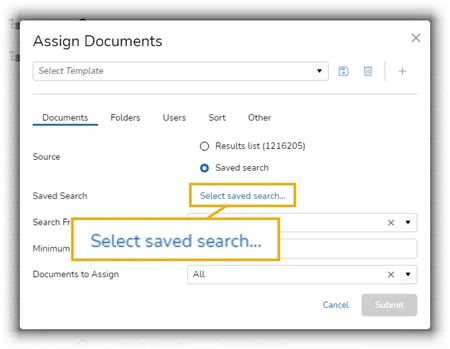
If you select Saved search in the Assign Documents modal, you are presented a set of options specific to saved searches:

From here, click on Select saved search… to choose a saved search that has the documents you want to use:
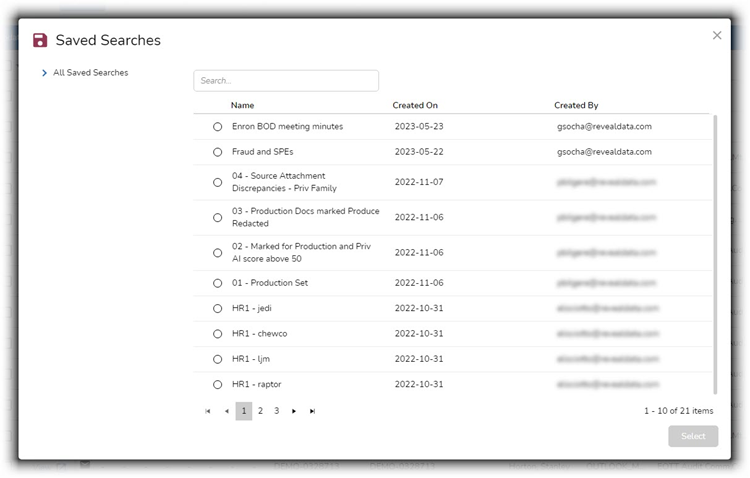
This will open a Saved Searches modal with a list of available saved searches. In this example, I have access to 21 saved searches:
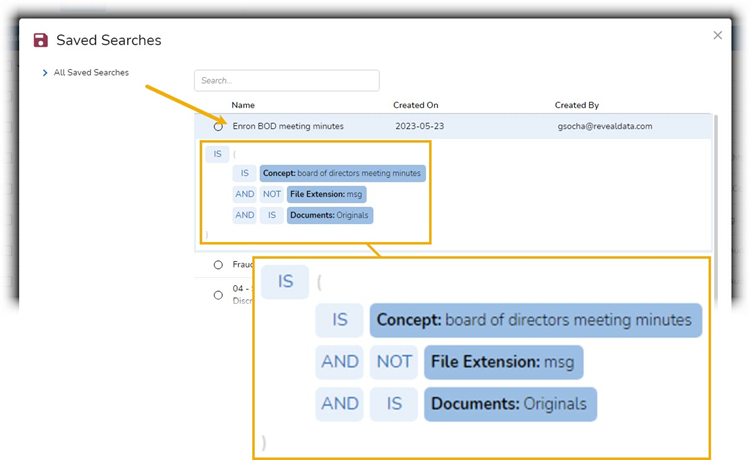
To see a search, and not just its name, click on the name of the search:
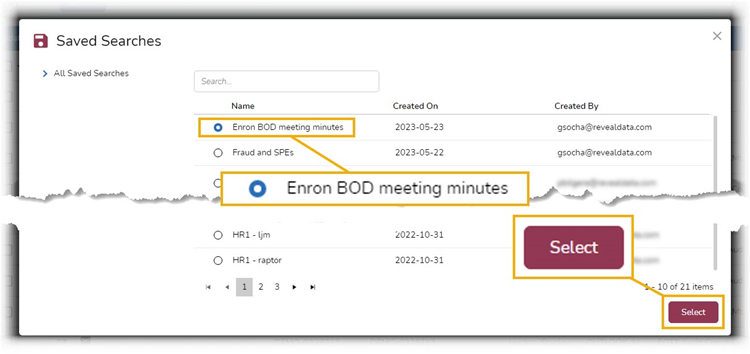
Select the saved search you want to use, and click the Select button:
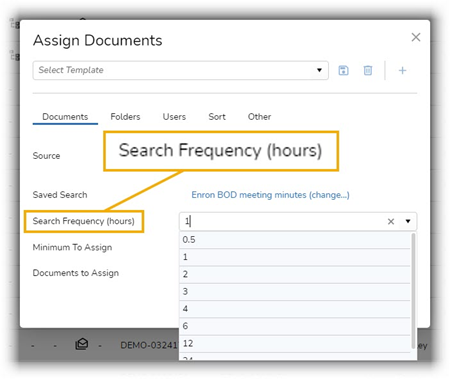
Specify how frequently you want the search to run for auto-assignment (Search Frequency). You can choose from ½, 1, 2, 3, 4, 6, 12, and 24 hours (I opted for hourly):
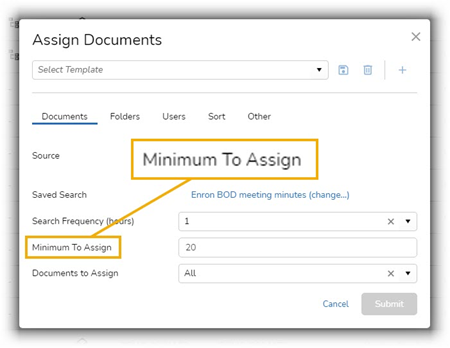
Next, you designate the smallest number of documents to go in an Assignment (I chose 20):
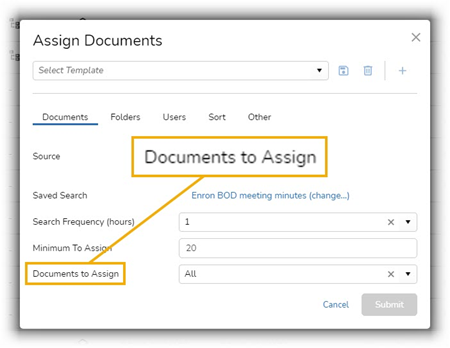
Finally, you indicate whether to assign all documents or to use the Random capabilities discussed above:
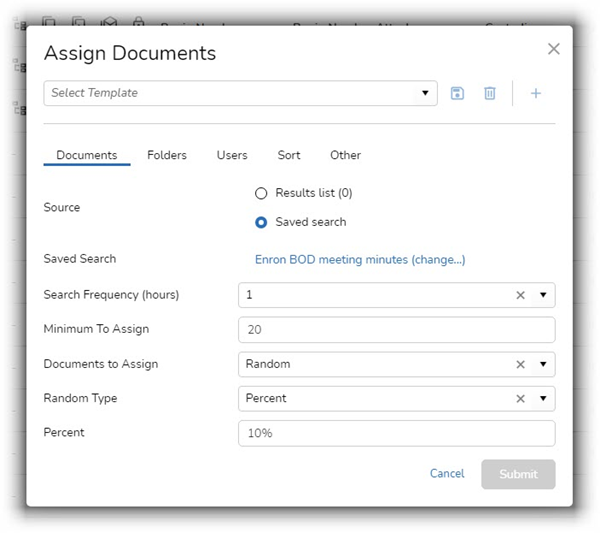
For this example, I opted to have searches run every hour, with at least 20 documents in a batch, and to have the platform do a random selection of 10% of the documents in my BOD meeting minutes saved search:
Once again, select the Folders tab to go to the next step.
Step 2: Designate Container into Which Selected Documents Go
The second step in assigning documents is to designate the Folder to be used for the Assignment. You can create a new Folder or use an existing one.
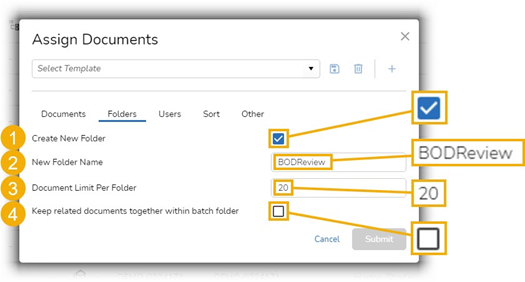
To create a new folder,
- Select the Create New Folder option if that option is not already selected;
- Give the folder a short name, short because the folder name will be concatenated with a subfolder sequence number (BODReview001, BODReview002, etc.);
- Specify the maximum number of documents to go in each subfolder, not counting related documents; and
- Indicate whether you want related documents to be kept together in a single folder.
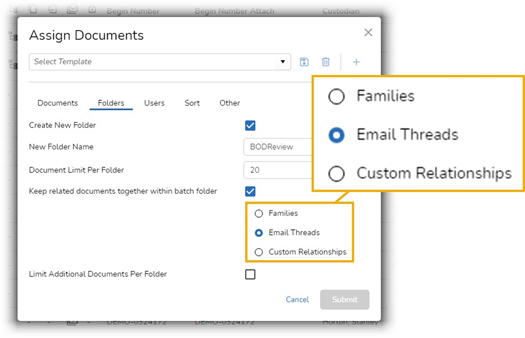
If you choose to keep related documents together in batch folders, you can choose which relationship to use: Families, Email Threads, or Custom Relationships that you create. I opted for Email Threads:
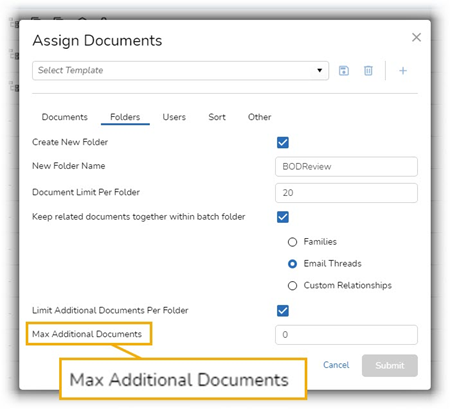
If you choose to have related documents kept together in folders, you also can set a cap on the number of additional documents included in those folders:
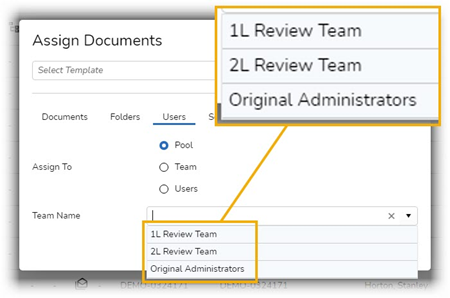
Step 3: Assign Documents to Pools, Teams, Individual Users
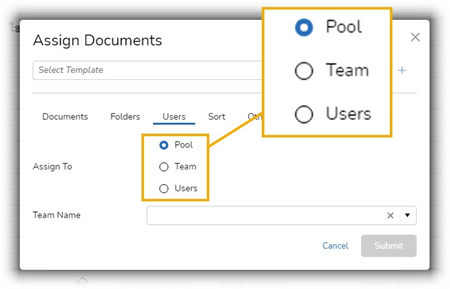
The third step in assigned documents is to delegate Assignments to users. You have three choices: Pool, Team, and Users:
- Pool: this choice creates a pool of Assignment folders from which pool members can check out Assignments.
- Team: selecting Team distributes the created folders as equally as possible across members of the designated team.
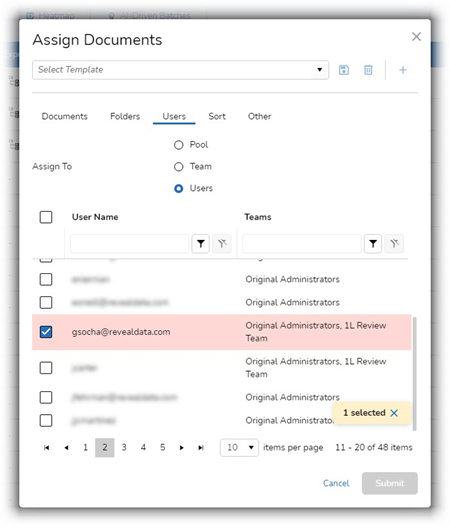
- Users: opt for this choice if you want to specify individual users to whom you make Assignments directly.
If you choose Pool or Team, you can select which of the available teams you want to use for assignments:
If you opt for Users, you can choose individual users to whom assignments can be made available:
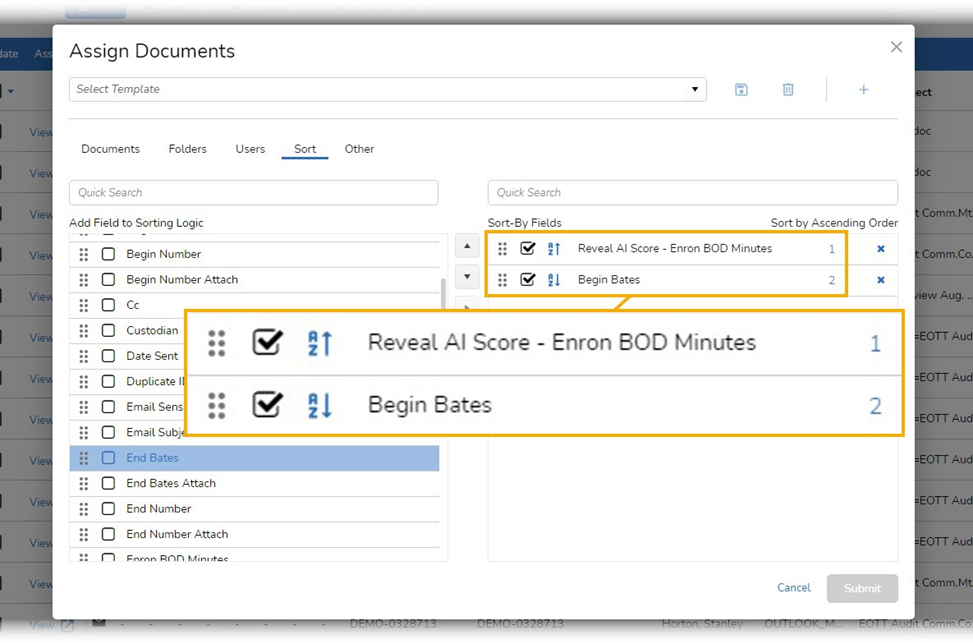
Step 4: Specify Order in Which Documents Will Be Organized
For the fourth step, you can specify the order in which assigned documents will be organized. Here, for example, I have opted to have the documents sorted (1) from highest AI score to lowest and (2) from lowest beginning Bates number to highest:
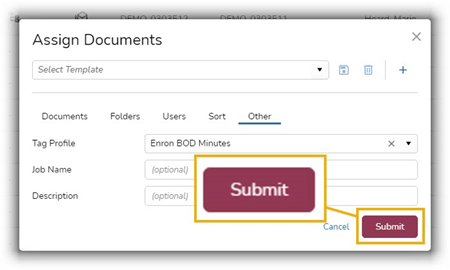
Step 5: Select Tag Profile, Name Batch, Submit Assignment
For the final step, I select the Tag Profile to be used for the assignments, add an optional job name, and include an optional description:
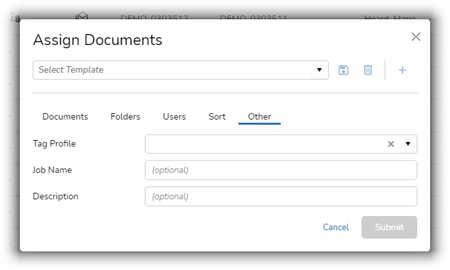
Once I select a Tag Profile, the Submit button becomes available and I can submit the assignment:
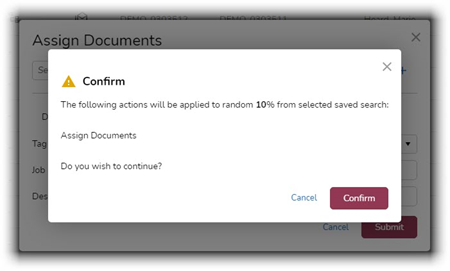
At this point, I am asked to confirm:
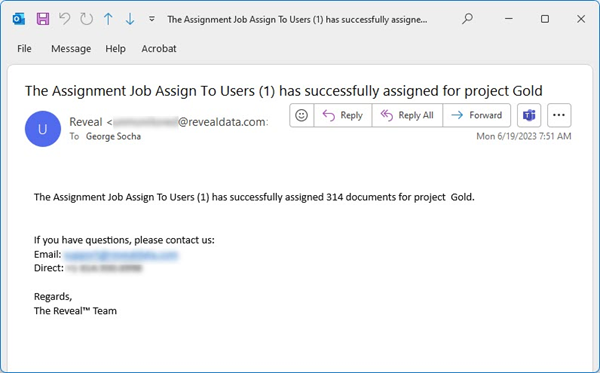
Upon completion of the assignment, I receive a confirmation email message:
Learn More
Reveal offers a wealth of ways you can find and work with the data that matters to you most. For more information about how Reveal can empower you and your organization, contact us for a demo.
.png?width=1080&height=300&name=Blog%20Bottom%20Banner%20Ad%20-%20Youtube%20-%20Subscribe%20(1).png)