


AI Tags are one of the workhorses of the Reveal platform. AI Tags train AI Models, and AI Models help you find and prioritize content more quickly, efficiently, and reliably.
In this post I will address what AI Tags are and how you can create them.
To get there, I have organized this post into eight parts:
- Tags
- Create a Tag
- Tag Profiles
- Create a Tag Profile
- Tag Validation Rules
- Create a Tag Validation Rule
- Test Tag Validation Rules
- AI Tags
Tags
An AI Tag is a type of Tag. Tags are a mechanism in Reveal you can use to associate decisions with a document. For example, you might use a tag to track whether you think a document is responsive, relates to an issue, contains confidential content, and so on.
Here is an example of a basic tag:
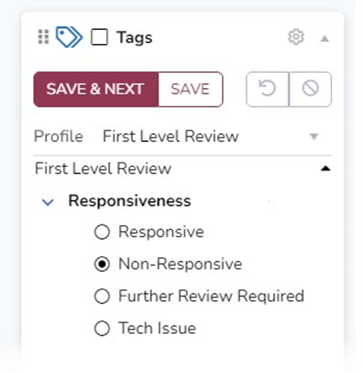
This tag is a Mutually Exclusive one: you must choose one option. You can use this tag to label a document as responsive, non-responsive, in need of further review, OR subject to a technical issue of some sort. You cannot use it to tag a document as both responsive and non-responsive, or both responsive and in need of further review.
Create a Tag
Assuming you have the permission rights to do so, here is how you create a new tag in Reveal.
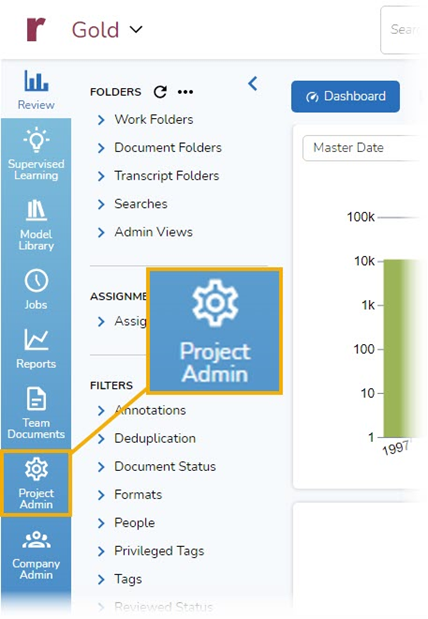
- Go to Project Admin:
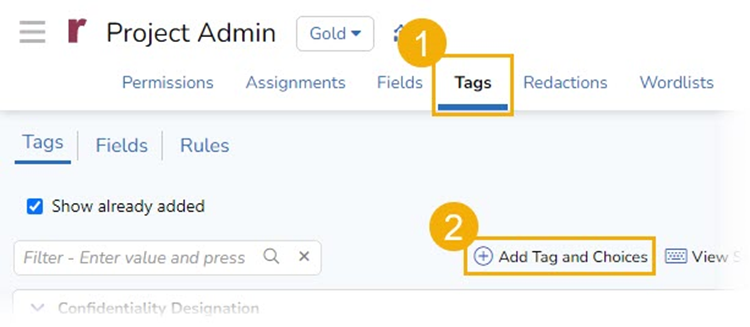
- Select Tags and then Add Tag and Choices:
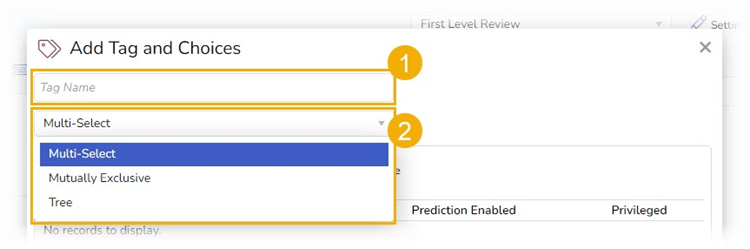
- Give the tag a Tag Name and choose the type of tag you want to use, Muli-Select, Mutually Exclusive, or Tree:
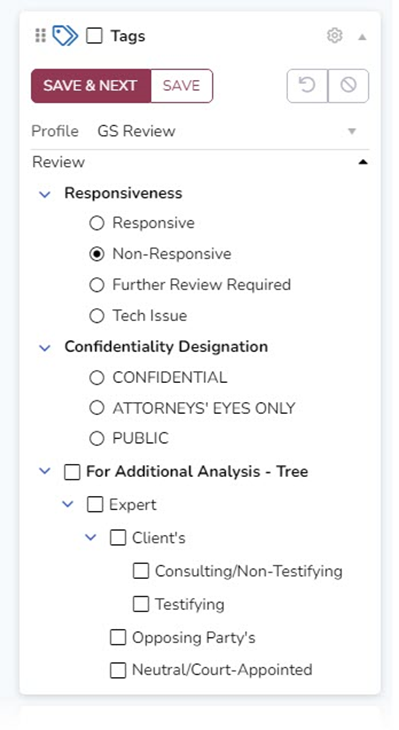
Here are examples of all three types:
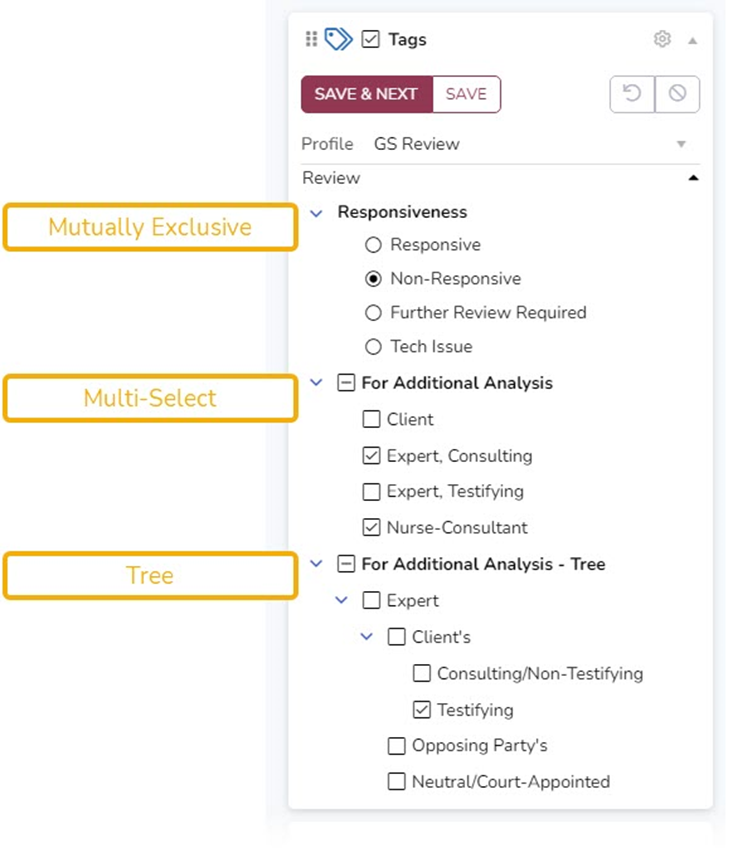
Mutually Exclusive: With a Mutually Exclusive tag, you may only select one option. Because Non-Responsive is selected, none of the other options can be chosen as well.
Multi-Select: With a Multi-Select tag, you may choose as many of the options as you would like. In this example, both Expert, Consulting and Nurse-Consultant have been selected.
Tree: Tree tags contain multiple levels of tags. With Tree tags, you can choose as many tags as you would like. If you choose a lower-level tag, your choice automatically gets applied to tags higher in the hierarchy. In the example above, checking Testifying means that Client’s and Expert both are automatically tagged as well.
Tag Profiles
To use them, Tags need a home. This home is a Tag Profile. You can create different Tag Profiles for different uses. A common approach is to create at least two Tag Profiles, one for first level review and another for second pass review. You could create panels designed for a team of attorneys working on appellate issues, panels for use by expert witnesses, and so on.
A Tag Profile consists of one or more Panes. Each pane contains one or more Tags. For today, we will use a single Pane with several Tags.
Here is the Tag Profile I created for the examples above:
Create a Tag Profile
To create a new tag profile:
- Go to Project Admin and select Tags, just as above.
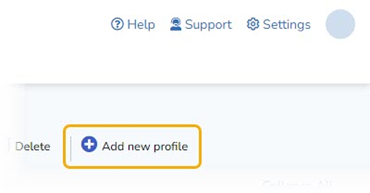
- Click on Add new profile: in the upper right corner of the window:
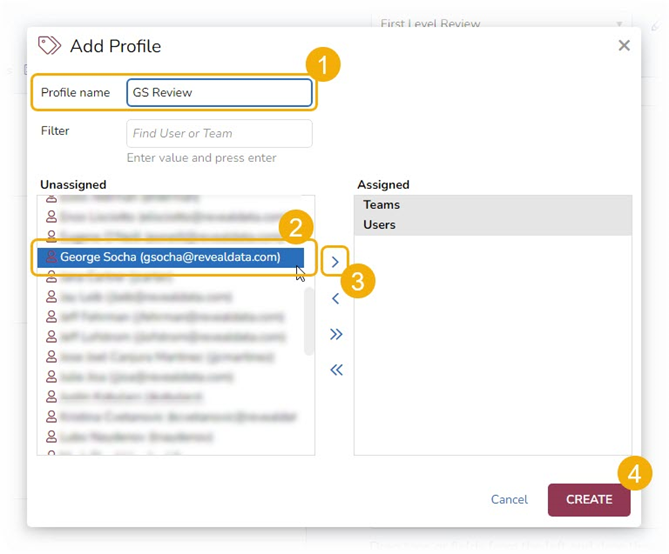
This opens the Add Profile modal (a modal is a UI, or user interface) element that sits on top of an application’s main window).
3. Give the new profile a name; select, team, teams, person, or people who should be able to use the profile; assign them to the profile; and select CREATE:
The initial profile will be empty. You will need to add one or more Panes. To add a pane:
- Select Add Pane:
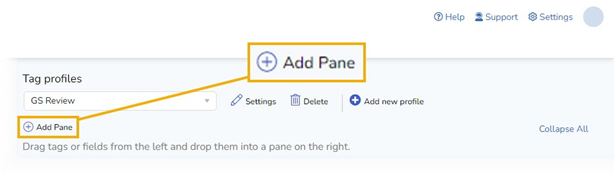
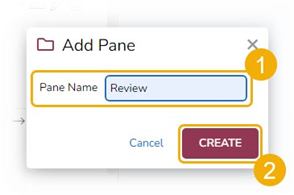
- Give the Pane a name and select CREATE:
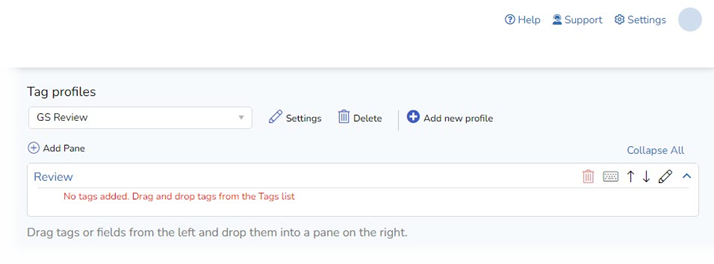
Now you will have a Pane, but it will not contain any Tags:
To add Tags:
- Find the Tag you want to add.
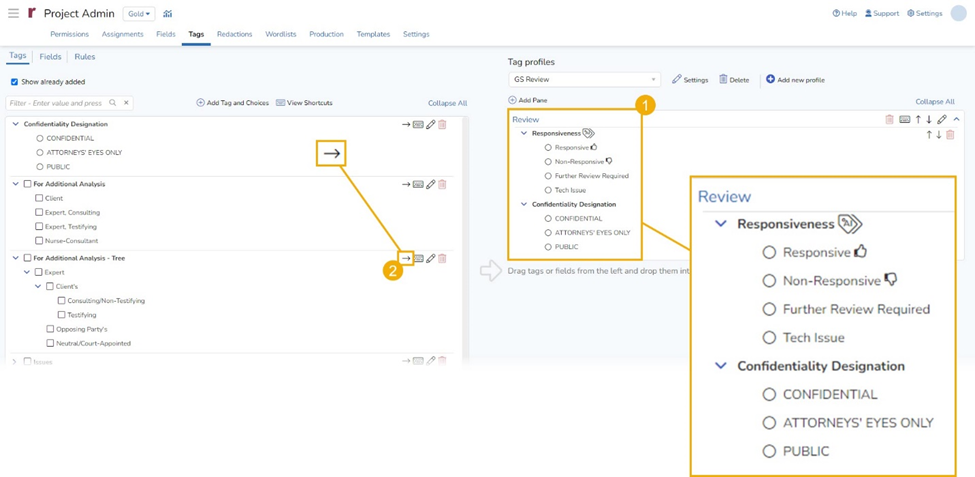
- Either drag the Tag from the left and drop it into the Pane on the right or click on the arrow in the tag to add the Tag to the Pane.
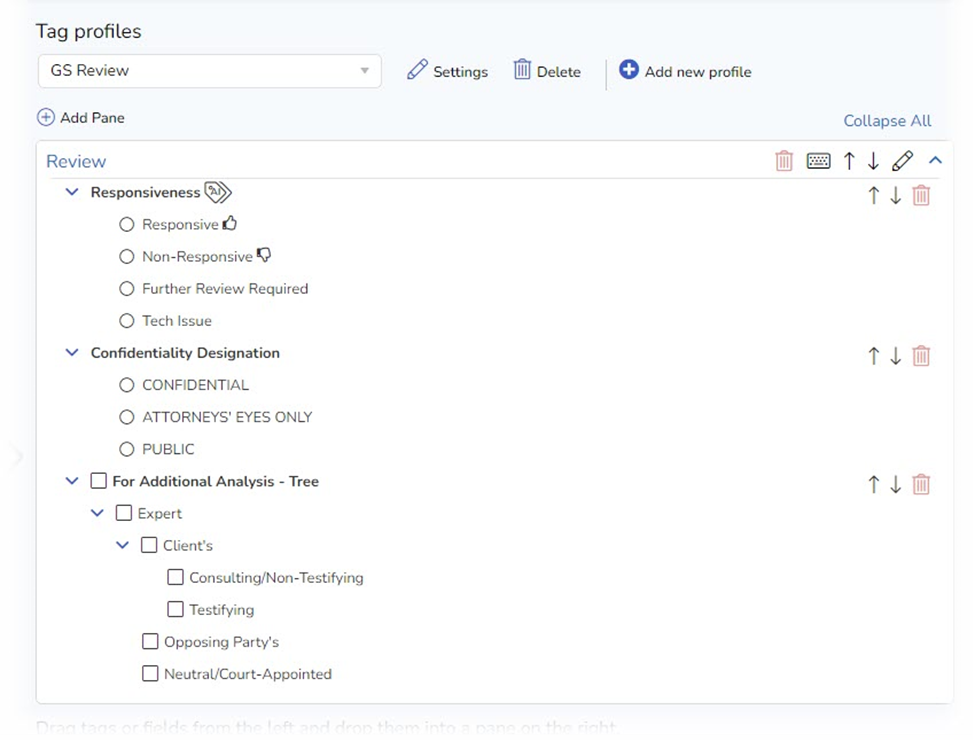
Here, I added the Responsiveness and Confidentiality Designation Tags to the Review Pane, and am about to add the For Additional Analysis – Tree Tag:
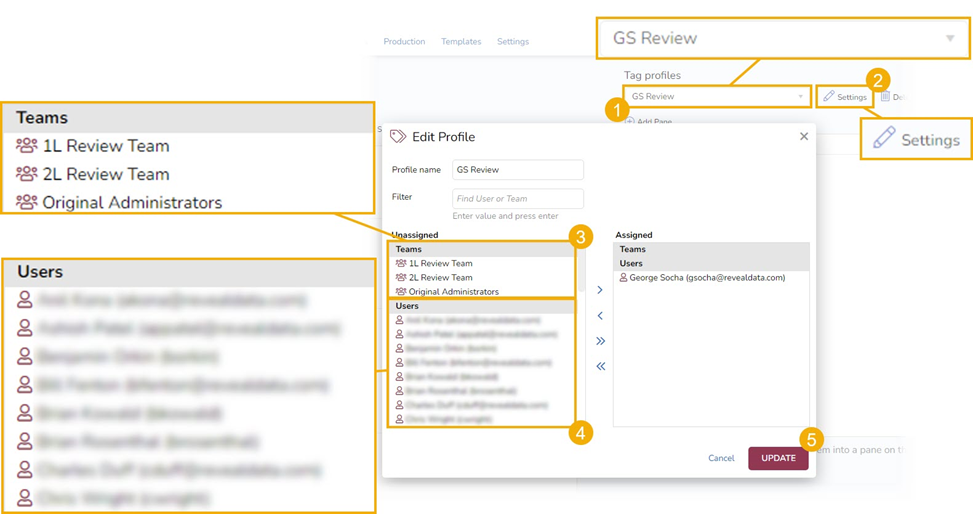
Once you have created a Tag Profile, you can assign teams and users to it. To do this, go to Project Admin and select Tags, and then:
- Select the desired Tag Profile.
- Select Settings.
- Select any teams you want to assign to the Profile, then click on the right-facing arrow to add those teams.
- Select any individual users you want to the Profile, then click on the right-facing arrow to add those teams.
- Select UPDATE to update the changes to the Profile.
Tag Validation Rules
If you only have a tag or two in a matter, making sure that tags work properly with each other is not much of an issue. With more and more complex tags, that quality assurance can quickly spin out of control.
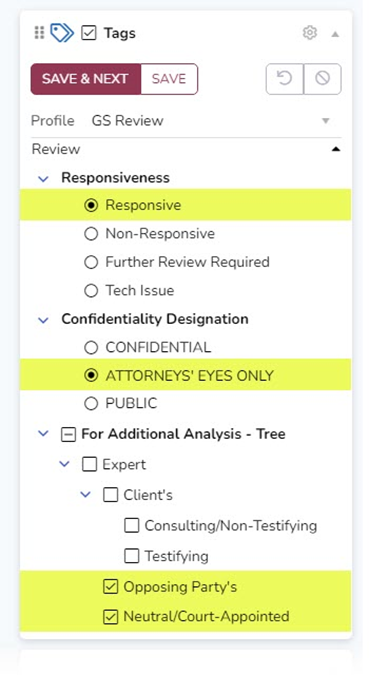
Take this scenario as an example. You have three tags, the Responsiveness and For Additional Analysis - Tree tags from above and a Confidentiality Designation tag:
You want reviewers and others working with the data to use the codes and to use them effectively. You don’t want these folks to select tags that are not compatible with each other. For example, if someone tags a document as Responsive and chooses ATTORNEY’S EYES ONLY, you may not want that person to be able to also select that document as one that should be made available to the other side’s expert witness or to a court-appointed neutral expert, as shown here:
Tag Validation Rules help you avoid that situation.
Tag Validation Rules do as the name suggests. If you have administrative rights, you can create Tag Validation Rules. Once you create a Rule, you can use it to test whether the Tags you have set up in a Tag Profile work as you intended. Once your Rule is deployed, if users try to tag documents in ways not permitted under the Rule, they will not be able to save the Tags they have applied or skip to the next document.
Create a Tag Validation Rule
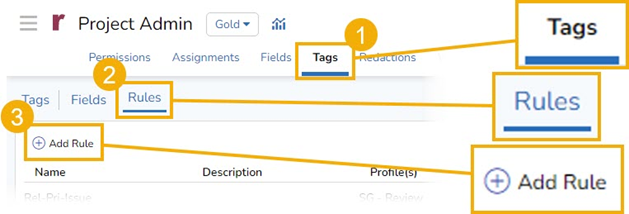
To create a Tag Validation Rule, go to Project Admin, select Tags, select Rules, then select Add Rule:
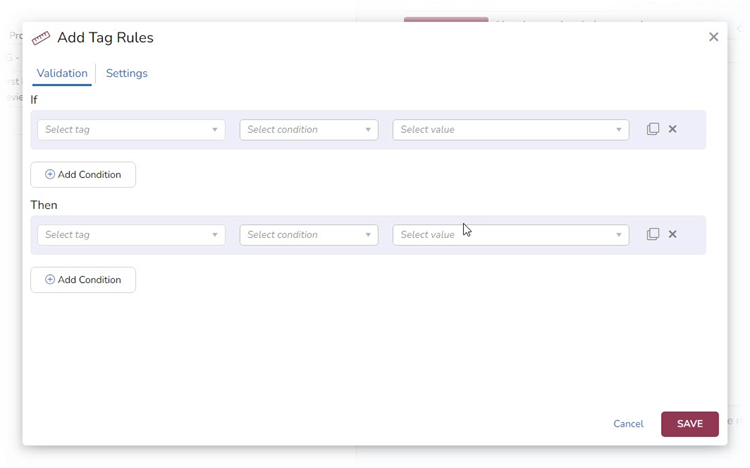
This opens the Add Tag Rules modal, which has two parts, Validation and Settings.
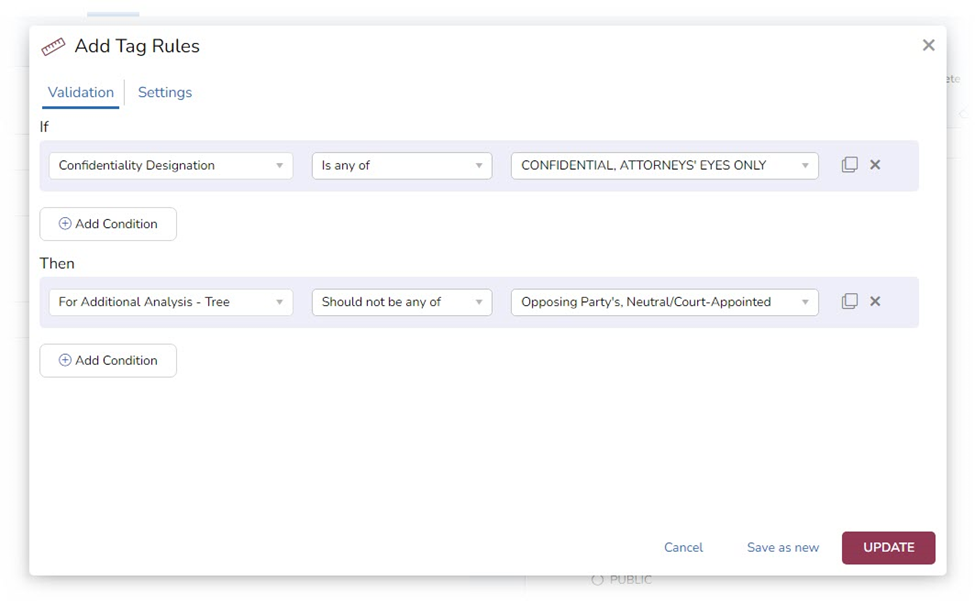
The Validation part of the modal is the place where you create Validation Rules. This uses an if-then structure with which you can make Rules ranging from simple to highly complex:
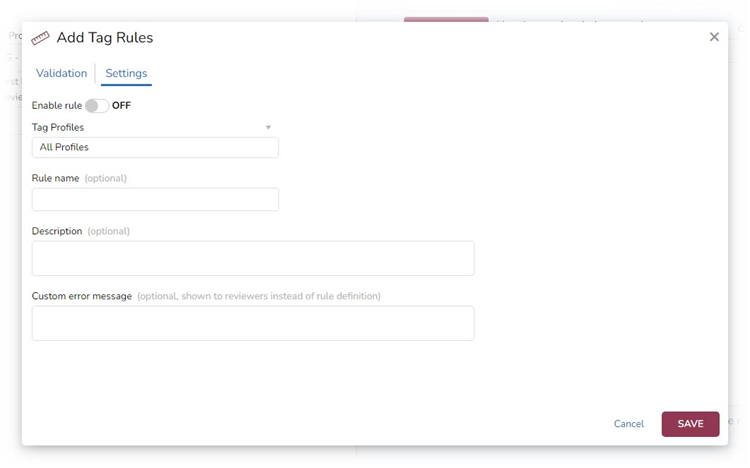
The Settings part of the modal is the place you name a Rule, enable it, assign it to one or more profiles, give it a description, and add a customer error message if one is desired:
For this exercise, I create a rule to do the following:
- IF a reviewer tags a document as (1) confidential or (2) attorneys’ eyes only,
- THEN the reviewer will not be allowed to tag the document for additional analysis by (1) the opposing party’s expert or (2) a neutral or court-appointed expert.
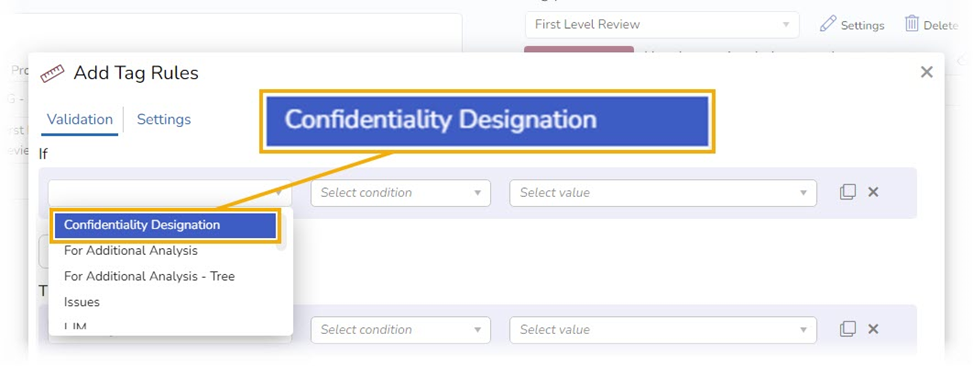
Starting in the Validation section, I create the If statement.
- In the Select tag box, select the Confidentiality Designation tag:
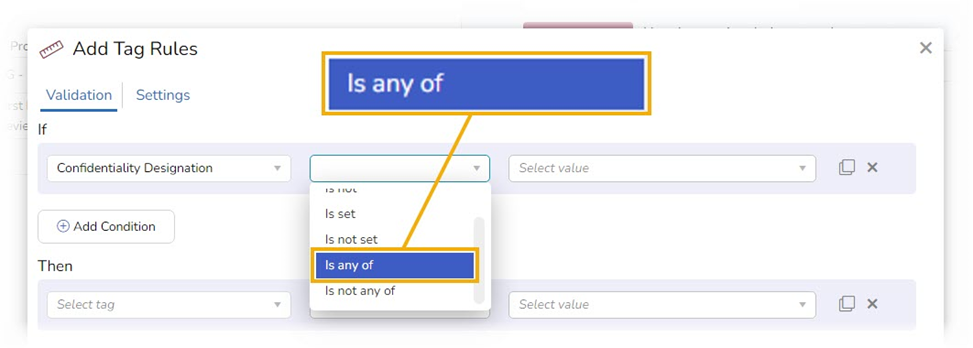
- In the Select condition box, select Is any of:
- In the Select value box, select both CONFIDENTIAL and ATTORNEYS’ EYES ONLY:

Next, I create the Then statement.
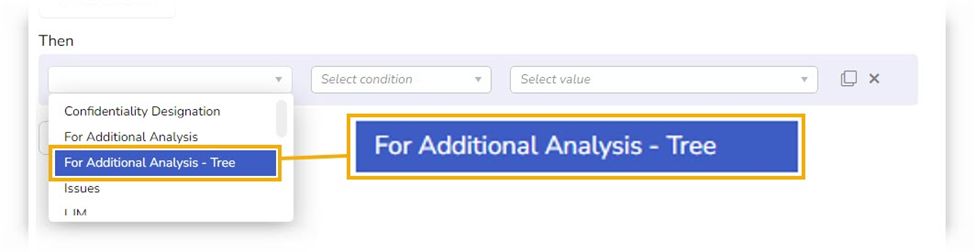
- In the Select tag box, select the For Additional Analysis - Tree tag:
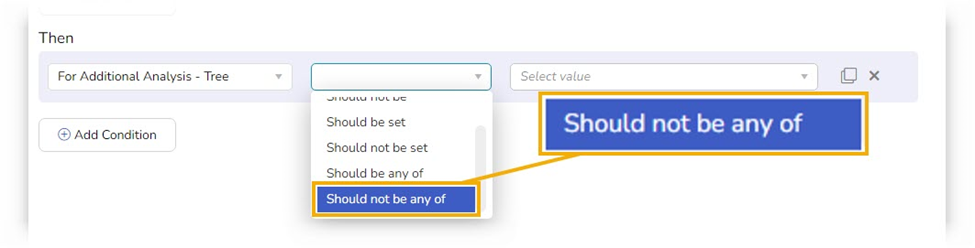
- In the Select condition box, select Should not be any of:
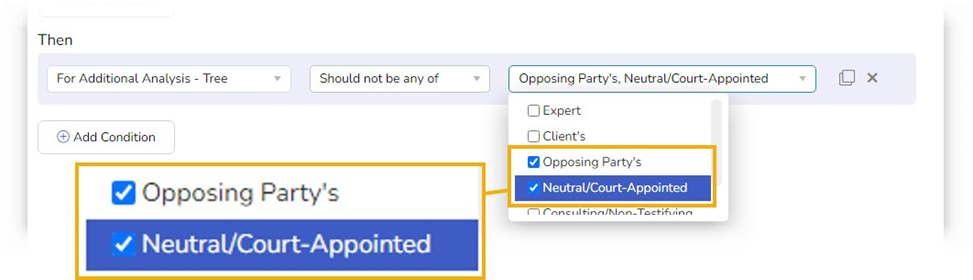
- In the Select value box, select both Opposing Party’s and Neutral/Court-Appointed:
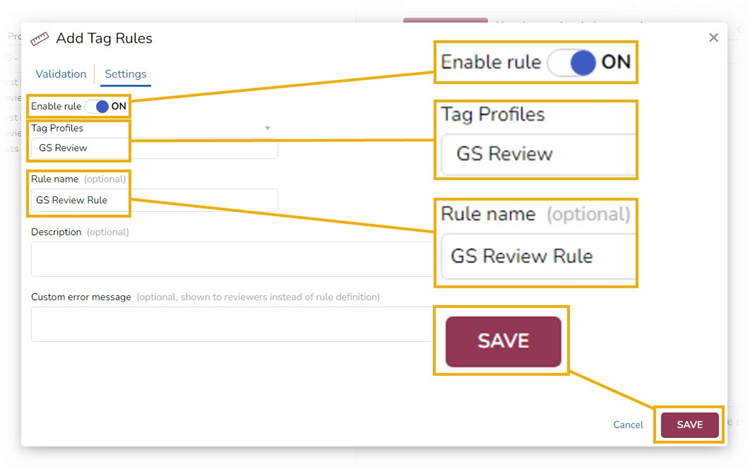
In the Settings section, I enable the Rule so I can test and use it, assign it to a Tag Profile, give it a name, and save it:
Here is the new Rule:
Test Tag Validation Rules
You can test whether your Tag Validation Rule operates as intended.
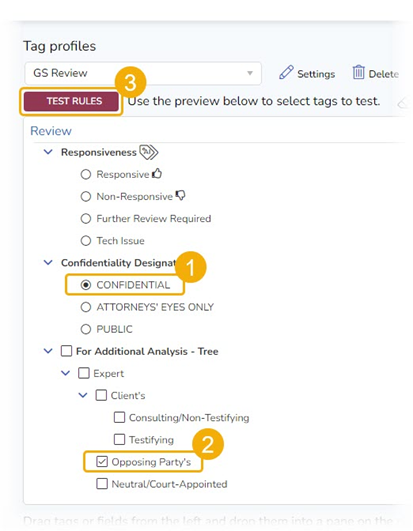
This Rule I set up is supposed to be set up so that if a reviewer selects CONFIDENTIAL, the reviewer should not also be able to select Opposing Party’s under Expert.
To test the Rule:
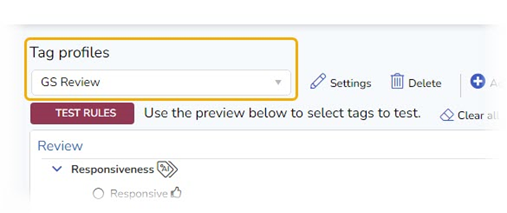
- Go to Project Admin, select Tags, and select Rules.
- Select a Tap Profile associated with the Rule:
- Select a Tag or combination of Tags to test, then select TEST RULES:
If the Rule works properly, an error message should be displayed. That is what happened here:
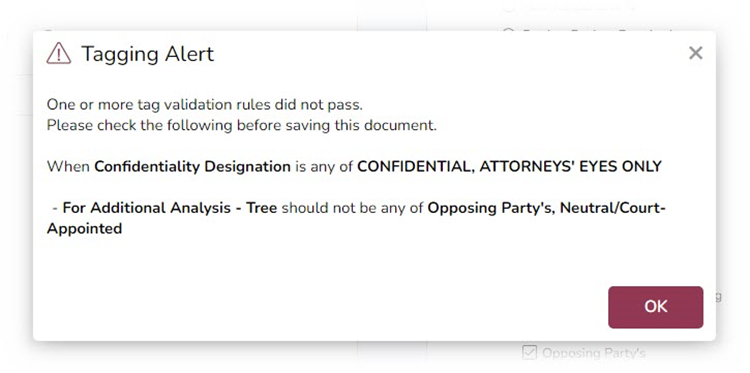
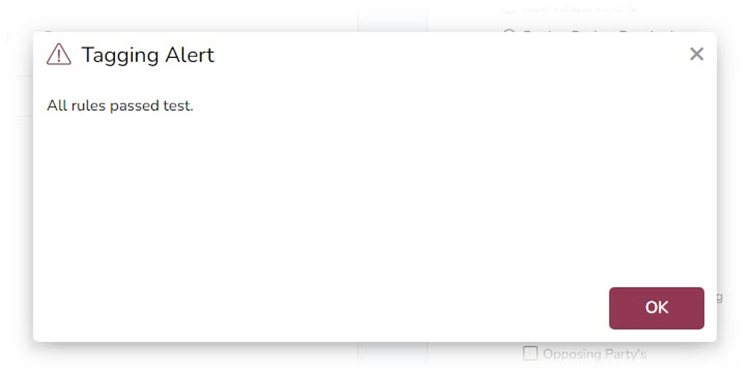
Where a reviewer makes a selection of Tags that does not violate the Rule, the test should come back with a message saying that all rules passed the test. For this test, I chose only one Tag, CONFIDENTIAL, and ran the test. Here is the result:
AI Tags
As noted at the beginning of this post, an AI Tag is a type of Tag. The difference is that an AI Tag has been Prediction Enabled. When an AI Tag is Prediction Enable, the platform automatically creates a Classifier of the same name.
When a document is coded using that AI Tag, the platform uses that information to train the Classifier. As the Classifier learns from its training, it creates predictive scores for all the documents in the data set. A predictive score indicates the platform’s assessment as to how likely a match the classified document is with the documents used to train the Classifier. Scores range from 0 to 100, with 0 being least likely and 100 being most likely.
To create an AI Tag, start with a Tag and select Prediction Enabled.
To do this:
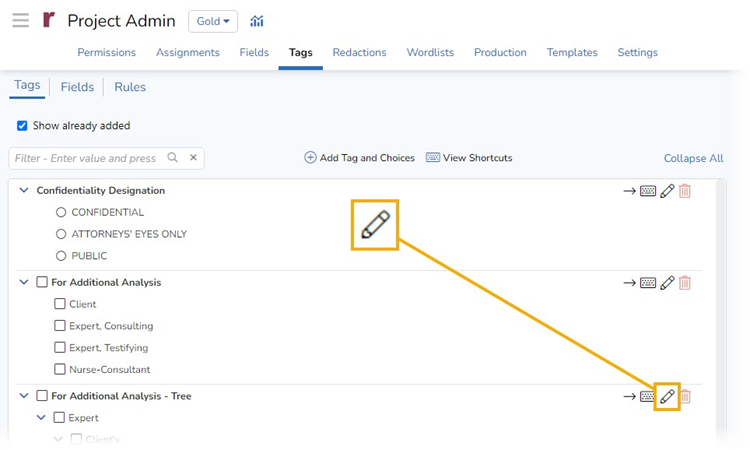
- Go to Project Admin and select Tags.
- From the available Tags, chose one to enable and click on the edit icon:
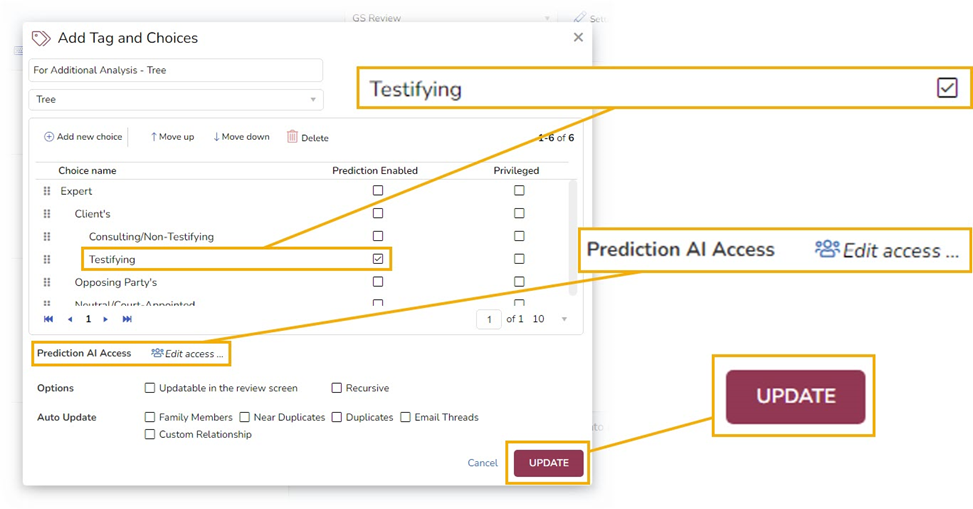
- Click Prediction Enabled for any Tags want to be used to train AI models, give access to that AI Tag to selected teams or individuals, and select UPDATE:
When you AI-enable a Tag, some visual indicators are added to the platform. You can control who sees, and who does not see, these indicators.
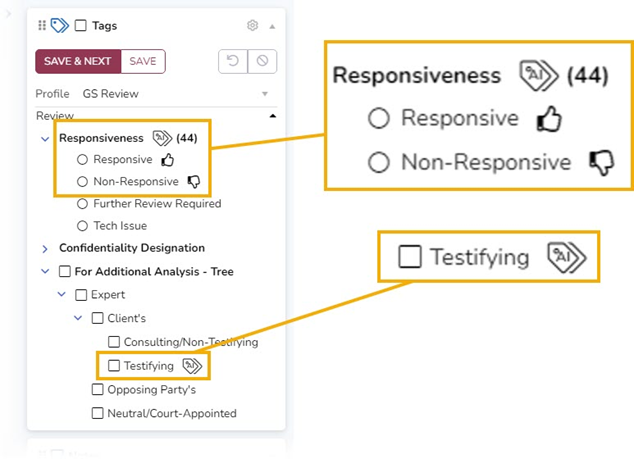
Here, you can see that:
- The Tag for which I selected Prediction Enabled, Testifying, now has an image of a tag to the right of it, with the letters AI inside the tag. Other Tags in that group for which I did not select Prediction Enabled, such as Opposing Party’s, do not have the indicator.
- Another Tag that previously was Prediction Enabled, Responsiveness, also has that indicator next to it. To the right of that indicator is a number in brackets, 44. This number means the platform thinks that this document is 44% likely to be responsive.
- The Responsive option has a thumbs-up icon next to it, indicating that by selecting that option a reviewer tells the system that this is a responsive document.
- The Non-Responsive option has a thumbs-up icon next to it, indicating that by selecting that option a reviewer tells the system that this is NOT a responsive document.
And There’s More
What I’ve shown today is just one part of the large set of AI capabilities Reveal puts in your hands, delivering a human-centered and responsible approach to AI that empowers legal professionals to make informed decisions faster.
For more information about how Reveal can empower your organization, contact us for a demo.